2015年5月18日星期一

DVDFab Media Player 2 – Free DVD ISO Player

DVDFab Media Player 2 is an excellent free DVD ISO player. Yes, it’s free for ISO playback, as long as you’re using it. And it’s really professional and easy to use. If you’re looking for a powerful free player for your DVD ISO files, you definitely would like to have a look at this demonstration.
 
Drag and drop a DVD ISO file into the player
You can directly drag and drop the DVD ISO file you want to view into the player after opening it. Or you can use the navigating wizard in the center of the interface. Click Open File to go to find the file then import it in.
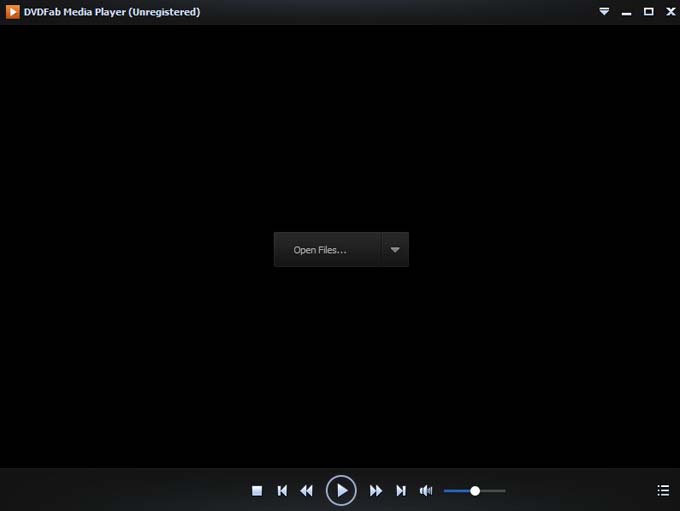
 
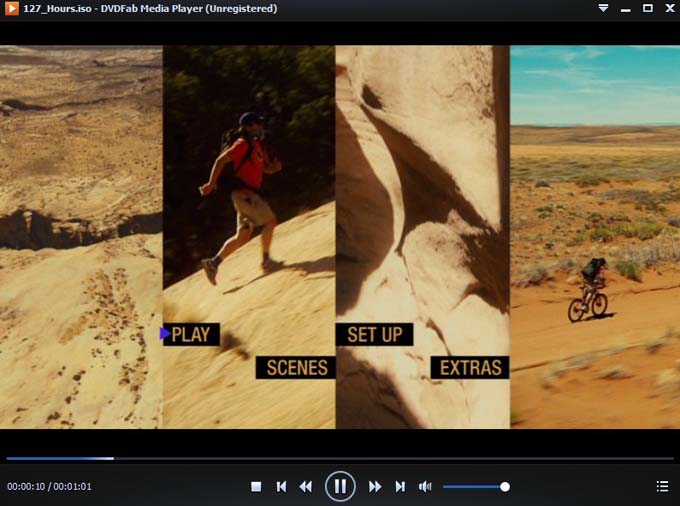
View movie like on a physical DVD player
You can view your movie immediately with no need to wait. Just navigate like on a physical DVD player.
 
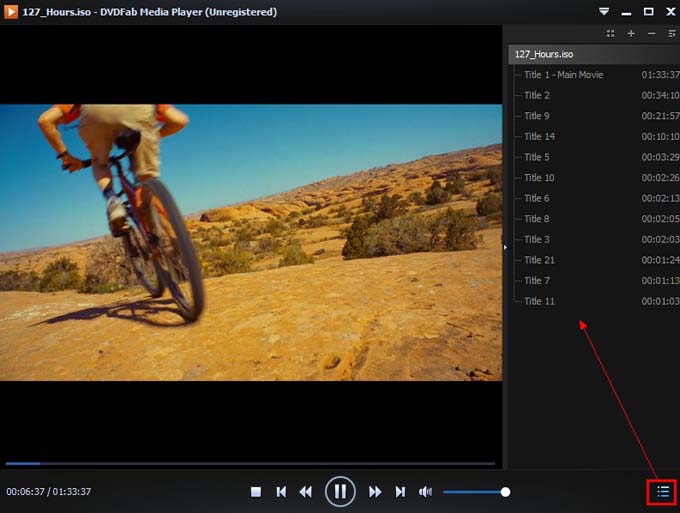
Use Playlist to switch between titles/movies
You can use the Playlist to choose any title you want to view. Or if you’ve loaded more than one files earlier, you can also switch between different movies.
 
Alright. Hope this will give you a general idea about this free DVD ISO player. If you want to learn more about it, please go to: http://www.dvdfab.cn/media-player.htm

2015年5月17日星期日

Create Blu-ray from Videos

DVDFab Blu-ray Creator allows users to create Blu-ray from videos. Nearly all standard-format videos can be converted into Blu-ray folders/image files or BDs. And a Blu-ray menu can be created and customized freely. Follow me to the detail step-by-step tutorial.
 
Step 1: Run DVDFab, select Blu-ray Creator mode
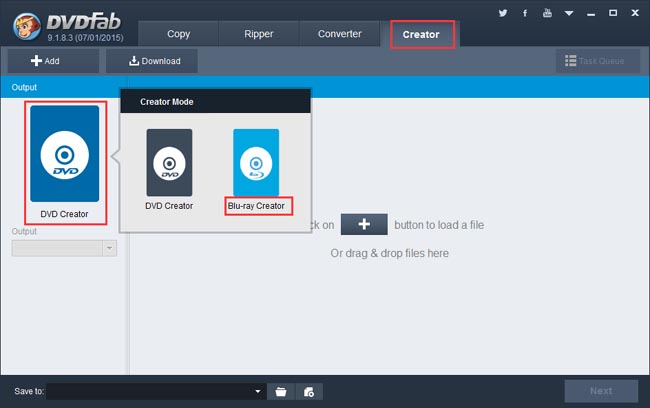
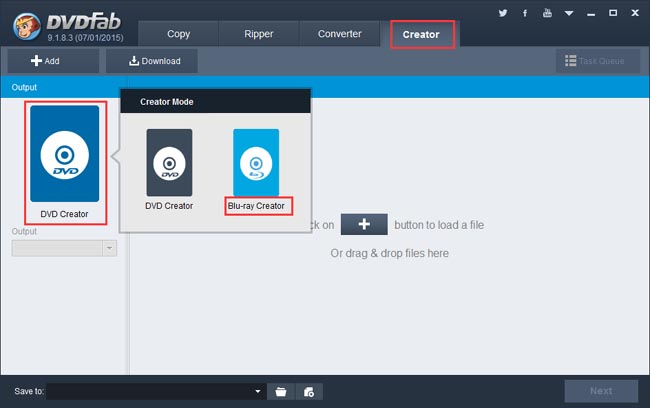
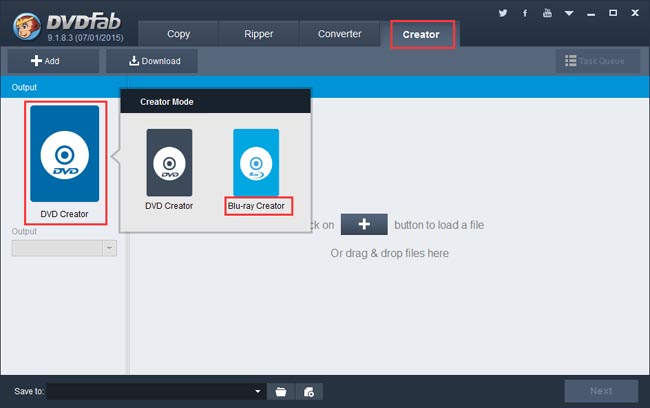
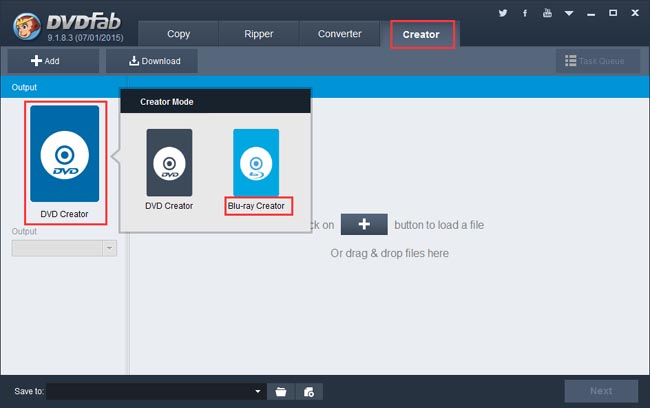
Run DVDFab after the free download and installation. Then go to Creator option. On the left panel of the following screen, if the default icon is not Blu-ray Creator, then please click the icon to do the selection.
 
Step 2: Load the source
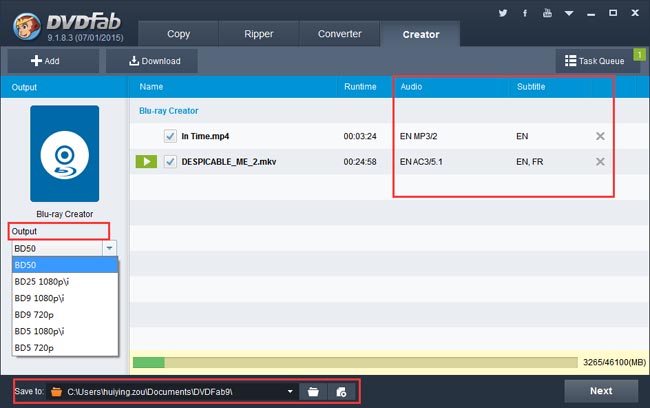
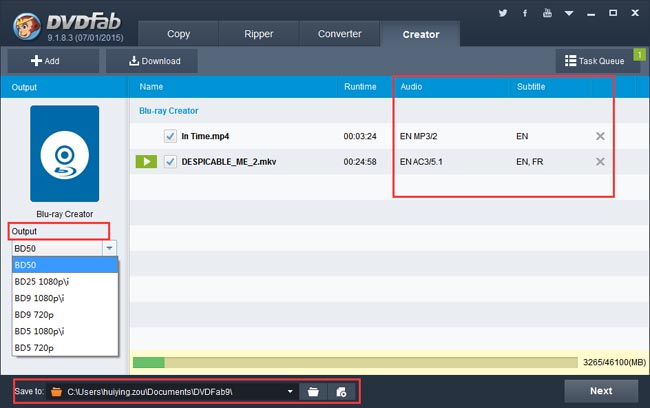
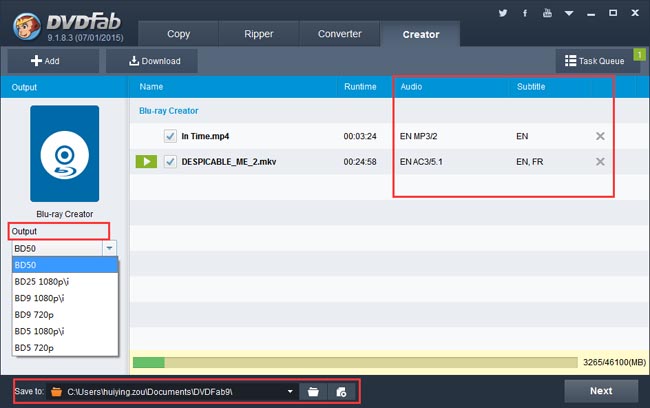
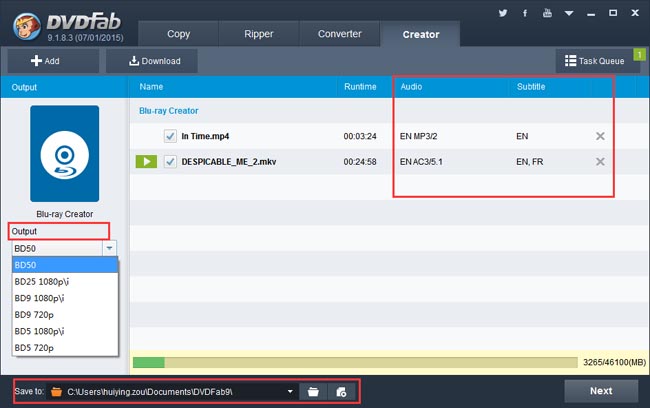
Click Add button to load the videos you want to process. Or drag and drop them into the program. Seconds later all the videos will be in. You can change their audio tracks and subtitles if there are multiple options. Then go to the left panel to select BD25 or BD50 for the Output, and go to the bottom “Save to” menu to specify a storage path. Note that the folder/image file icon is for the Blu-ray folder/image file output. If you want to burn the content into a blank Blu-ray disc, make sure to connected a Blu-ray drive to your PC then select the drive in the Save to box.
 
Step 3: Create the Blu-ray menu
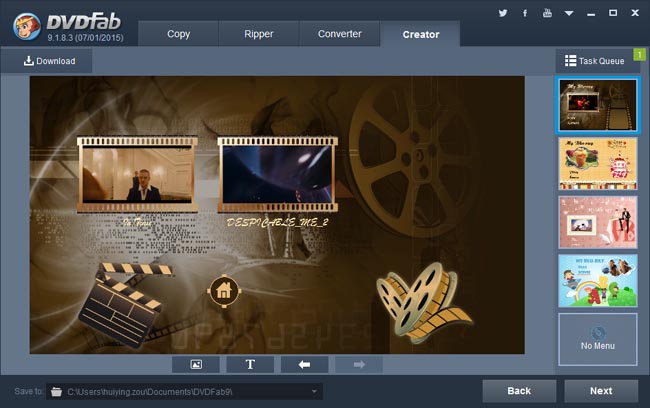
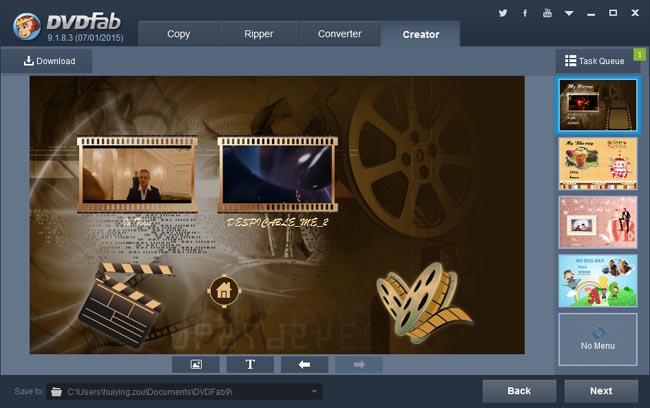
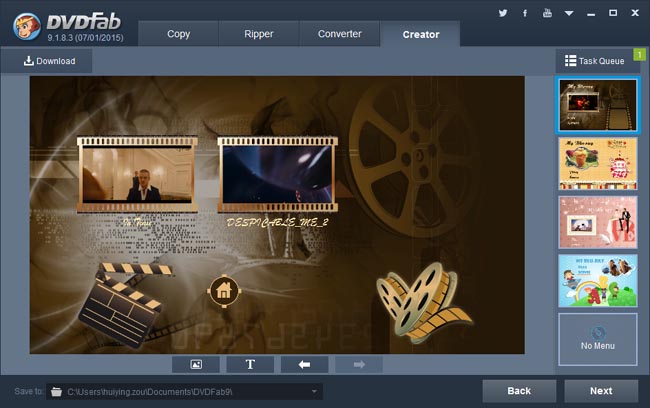
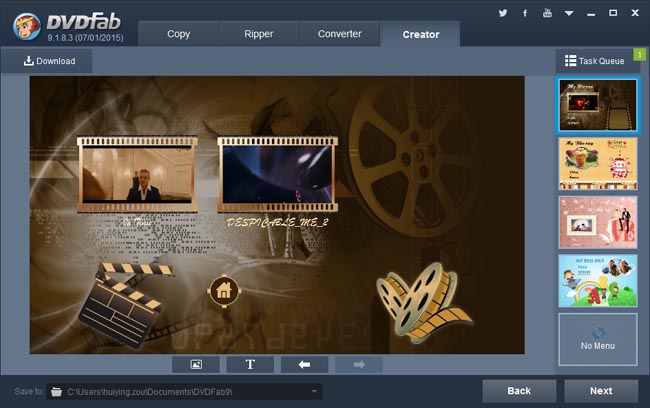
After the above settings, you’ll be led to the Blu-ray menu creation step. Many templates are built-in for your choice. If you want no menu, please select “No Menu” on the right panel.
 
Step 4: Start video to Blu-ray conversion
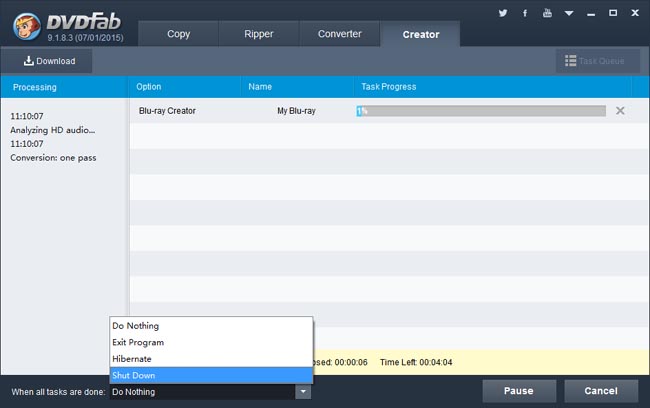
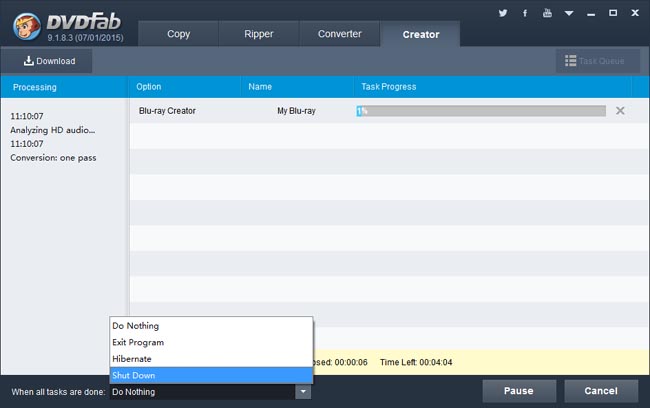
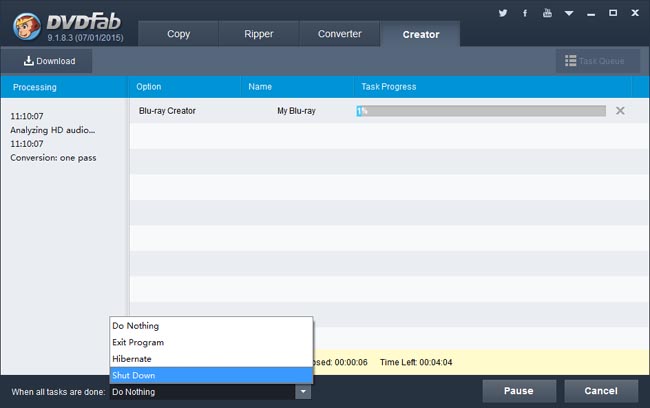
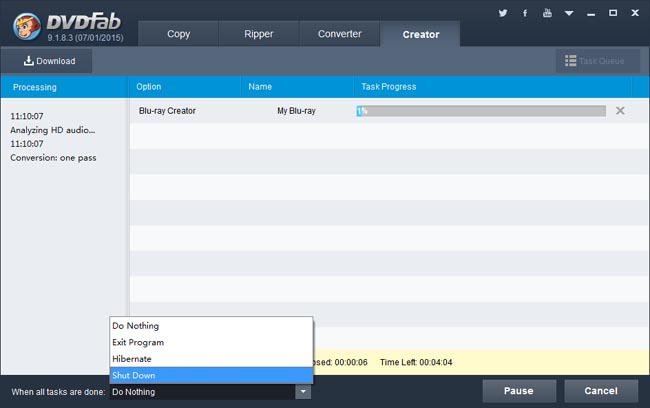
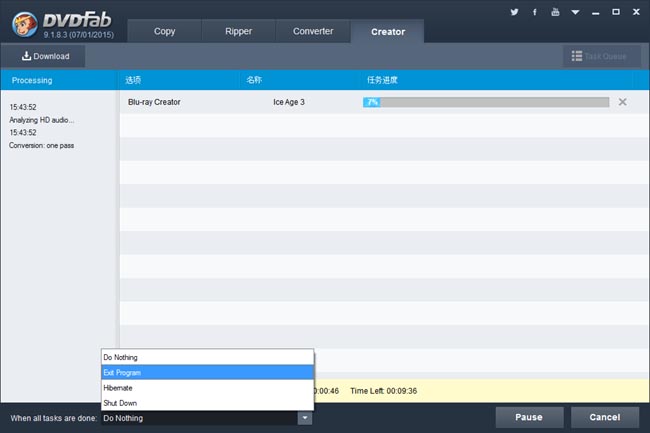
After everything is set up, click Start button on the main interface to start conversion. During the process, all detailed progress info can be viewed, and the PC can be set to shut down or hibernate when all tasks are done.
 
OK. That’s it. More info about DVDFab Blu-ray Creator, please visit: www.dvdfab.cn/blu-ray-creator.htm

2015年5月13日星期三

Copy Video to Blu-ray

DVDFab Blu-ray Creator can copy video to Blu-ray. It can deal with virtually all popular video formats, and can output Blu-ray folder, Blu-ray image file or Blu-ray disc according to your choice. It’s easy to use with only a few steps as follows:
 
Step 1: Run DVDFab Blu-ray Creator
Download and install DVDFab. Note that during the 30-day trial period, it’s free with full functions. Now run it and go to Creator option. If the default creator mode appearing on the left panel is not” Blu-ray Creator”, click the mode icon to select it.
 
Step 2: Load the source
Click Add button to load the source videos you want to copy and convert. Or drag and drop them into the program. You can also download online videos and use them as the source, by clicking Download button besides the Add button.
 
After the videos are imported, you can change their audio and subtitles if you like. On the left panel, you need to specify the Output as BD25 or BD50. And then select a storage path in the “Save to” box. Note that if you want to burn the content into a blank BD, please connect a Blu-ray drive to your PC, then the drive will show in the “Save to” box. Make sure you select it.
 
Step 3: Customize the Blu-ray menu
A Blu-ray menu can be created along with the output Blu-ray content. After loading the source you’ll come to the next step to create and customize the Blu-ray menu. There’re many built-in templates for your choice. If you don’t need a Blu-ray menu, just select “No Menu” on the right panel, then continue to the next step.
 
Step 4: Start conversion
Click Start button on the main interface to start conversion. During the process, you can view detailed progress info, and set your PC to shut down or hibernate when all tasks are done.
 
OK. That’s all there is to it. More info about DVDFab Blu-ray Creator, please go to: www.dvdfab.cn/blu-ray-creator.htm

2015年5月12日星期二

Video to Blu-ray Converter

DVDFab Blu-ray Creator is a video to Blu-ray converter which can convert virtually all standard-format videos to Blu-ray digital files or burn them into Blu-ray discs. And more videos can be processed at the same time for one Blu-ray. Now let’s have a look at the detailed operation.
 
Step 1: Run DVDFab Blu-ray Creator
Run DVDFab and go to the Creator option. Then make sure the creator mode is selected as Blu-ray Creator. If not, click on the mode icon on the left panel to choose.
 
Step 2: Import the source videos, and set the output size/type
Click Add button to add the sources into DVDFab. Or drag these videos and drop them into the program. After one or two seconds they’ll be in, with audio tracks and subtitles changeable if there’re multiple options for audio/subtitles. Go to the left panel now to choose BD50 or BD25 for the output size. And move to the bottom “Save to” box to specify a storage path for the output Blu-ray folder or ISO image file, or select the Blu-ray drive connected to your PC for burning the videos into a blank Blu-ray disc.
 
Step 3: Create a Blu-ray menu or not
Click Next then you’ll come to the Blu-ray Menu creation interface where you can create and customize the Blu-ray Menu for the output. If you want no menu, just choose “No Menu” on the right panel. Then click Next.
 
Step 4: Start conversion
After all settings are OK, just hit the Start button on the main interface to start the video to Blu-ray conversion process. During the process, you can view detailed progress info, and you can also set your PC to shut down or hibernate, or set DVDFab to exit, when all tasks are done.
 
Alright. If you want to learn more about DVDFab Blu-ray Creator, please go to: www.dvdfab.cn/blu-ray-creator.htm


2015年5月11日星期一

Video to Blu-ray Burner

DVDFab Blu-ray Creator is a video to Blu-ray burner which can convert and burn multiple videos into one Blu-ray disc or copy them into a digital file. And a Blu-ray menu is creatable and customizable. This video to Blu-ray burning software is darn easy to use. Let’s dive down to the detail.
 
Step 1: Run DVDFab and enable Blu-ray Creator
Run DVDFab and choose the Creator option. Click the Creator Mode icon on the left panel to choose the Creator Mode to be Blu-ray Creator.
 
Step 2: Load the source videos and do some initial settings
Click the Add button on the top left of the interface to load as many source videos as you want to process. After they’re in, you can change their audio tracks and subtitles if you like. Move to the left panel again, to specify the output size from BD50 and BD25. Then go to the bottom part to specify a storage path for the output. If you want to burn the video content into a blank BD, just choose the Blu-ray drive connected to your PC in the “Save to” box; if you want to copy the source into a Blu-ray folder or an ISO image file, just click corresponding icon to choose an output directory.
 
Step 3: Create and customize the Blu-ray Menu
Click Next button then you can create and customize a Blu-ray Menu for the output. If you don’t want any Blu-ray menu experience, just select “No Menu” on the right panel to skip this step.
 
Step 4: Start burning
Go to the main interface to click Start button, then the video to Blu-ray burning process begins. If you’ve set the output to be saved in a BD, then you’ll be asked to insert a compatible disc to start write process at some time after the Start button is triggered. Just insert the blank Blu-ray disc you prepared beforehand. And leave the rest to DVDFab. BTW, you can view detailed progress info and set your PC to shut down or hibernate when all tasks are done.
 
OK. That’s all. More info about DVDFab Blu-ray Creator can be found at: www.dvdfab.cn/blu-ray-creator.htm

2015年5月10日星期日

Convert FLV to Blu-ray

DVDFab Blu-ray Creator can convert the FLV videos you downloaded from YouTube into Blu-ray and create a Blu-ray disc or digital file. Now let’s have a look at how to use DVDFab Blu-ray Creator as a FLV to Blu-ray Converter.
 
Step 1: Run DVDFab Blu-ray Creator
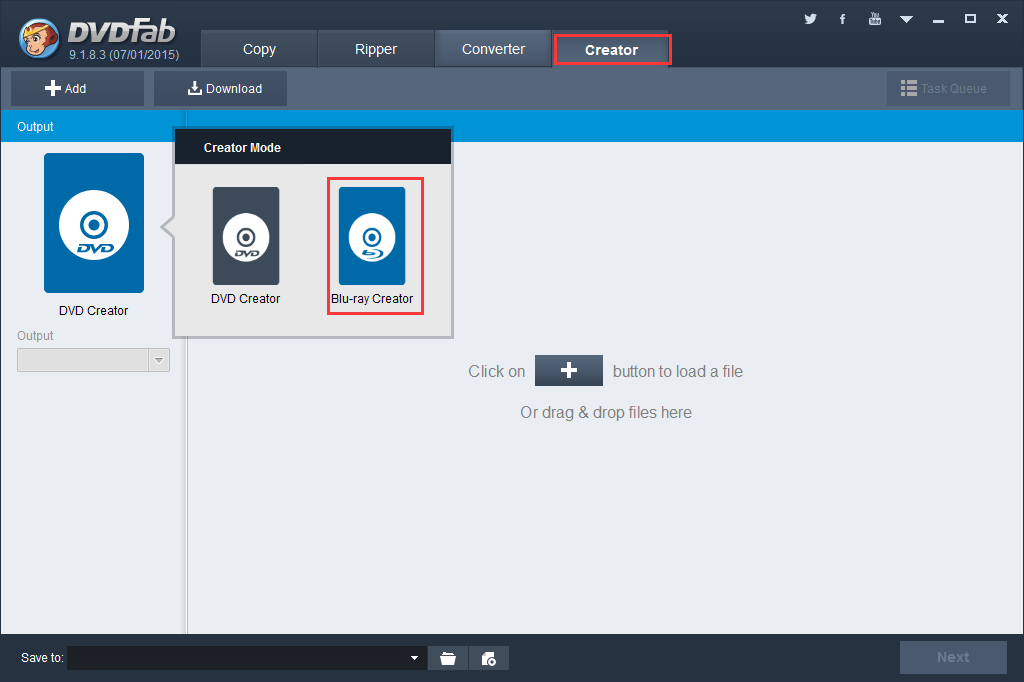
Run DVDFab, choose Creator. Now on the left panel, click the mode icon to select Blu-ray Creator, if the default icon is not showing Blu-ray Creator.
 
Step 2: Load the source, specify output size, type and storage path
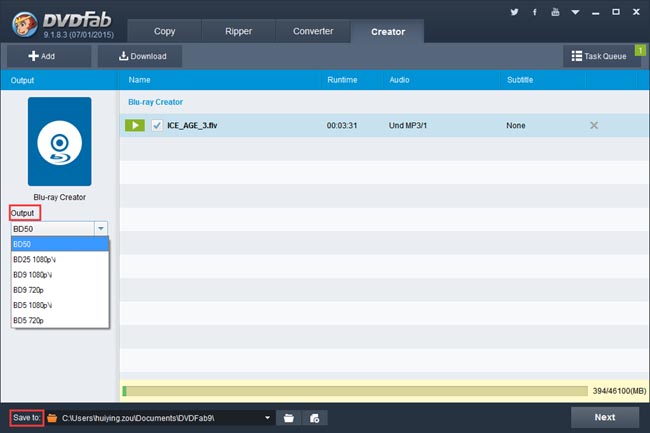
Click Add button to load the FLV video for conversion. Or drag the video into DVDFab program. One or two seconds later the source will be in. Continue to add more if you want to convert more videos to a Blu-ray.
Navigate to the left panel to specify the output size from BD25, BD50, BD9 and BD5. Then go to the “Save to” menu to select a storage path for the output Blu-ray movie folder or image file. If you want to burn the content into a disc, connect a Blu-ray drive to your PC then choose the drive here.
 
Step 3: Create Blu-ray menu
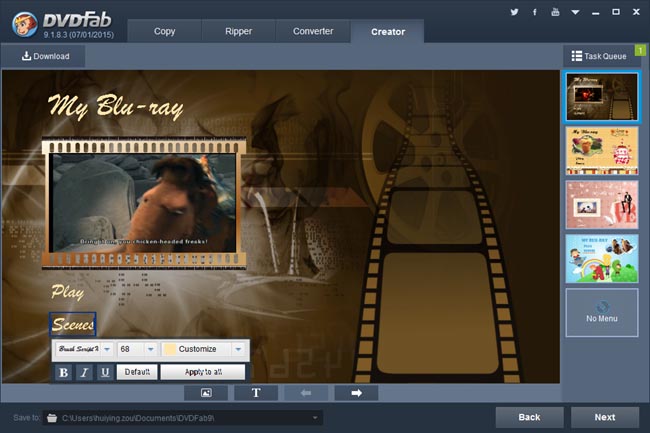
Now you are in the Blu-ray menu creation window. Here you can customize the Blu-ray menu for output, you can also select “No Menu” on the right panel to skip this step.
 
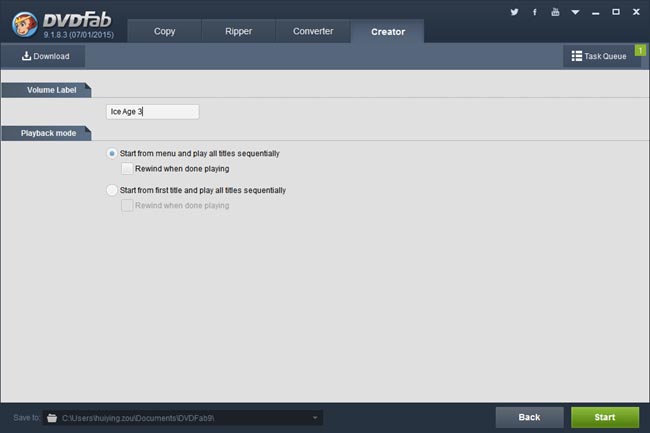
Next to change the volume label and set playback mode.
 
Step 4: Start conversion
Hit Start button to start conversion. During the process, you can set your PC to shut down or hibernate, or set DVDFab to exit, when all tasks are done.
 
OK. Now leave the rest to DVDFab. More info about DVDFab Blu-ray Creator can be found at: www.dvdfab.cn/blu-ray-creator.htm


2015年5月7日星期四

How to Backup Emails with Email Backup Software

Email is one of the main internal communication ways in work, also a common and important information exchange method. After a long period of time, you may have received or collected a lot of emails contain significant information and data. In order to prevent occasional email loss, email backup is necessary. For completing this task, just leave it to DVDFab PC Backup. It is a totally clean, safe and high-effective email backup software, accommodate both inexperienced users and experienced users.Just need few clicks, the whole email backup process will be finished painlessly.
Next, let's follow the detailed steps on how to backup emails with DVDFab PC Backup.
 
Before taken any steps, please ensure that you have installed DVDFab PC Backup correctly. For completing this step, you can choose to make a purchase or download the free trail.
 
Step 1: Start DVDFab PC Backup up, and opt for Mail Backup
After installation, start DVDFab PC Backup up. When arriving at the main window, navigate to Mail Backup located at the upper part.
 
Step 2: Select email to backup, and make settings
By clicking Mail Backup tab, the operation window will be brought out, and your email management system has been recognized. You can choose all, or select any specific folders you need. You can click the folder icon to modify the output directory in the Destination part, or the backed up emails will be stored in the folder created after DVDFab PC Backup is installed. Also, you can define the plan name and description.
 
Further, you can schedule the email backup to determine how often the backup executes, make more detailed settings like backup compression, encryption, performance priority, email notification, backed up image file reserve strategy, etc.
 
Step 3: Get this task run
If all settings are right for you, go ahead and take the last step. Just hit the Proceed button, this task will be executed immediately. Thanks to DVDFab's multi-core CPU, the newest NVIDA and CUDA support, the backup will be finished with leading speed.
 
OK, done! It's your turn to backup and protect your emails and contacts. Don't immerse yourself in the pain of losing. Act now!